Physical Address
304 North Cardinal St.
Dorchester Center, MA 02124
Physical Address
304 North Cardinal St.
Dorchester Center, MA 02124
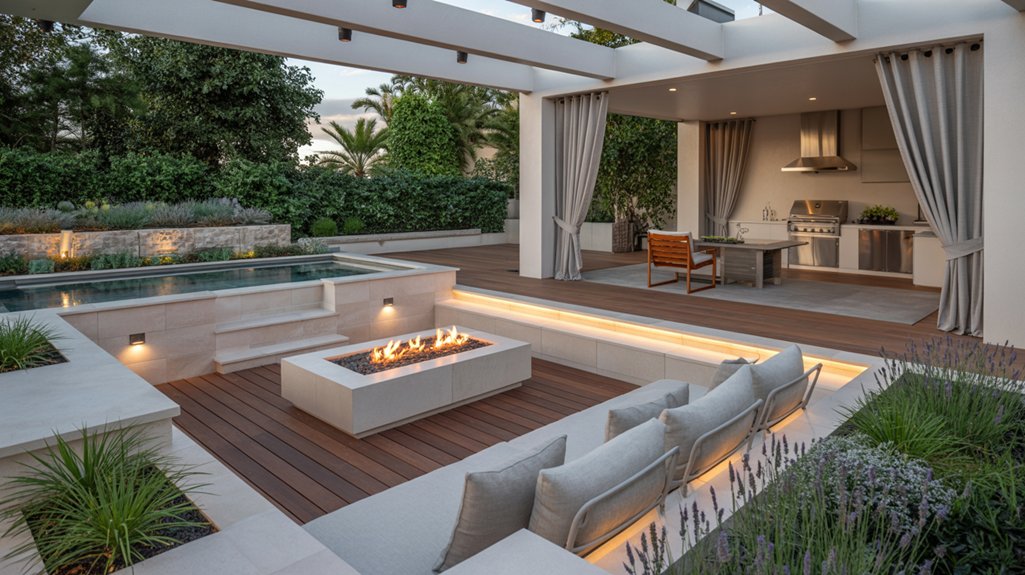
With the right layout, materials, and lighting, your empty backyard can become a daily luxury retreat — here's how to make it happen.
Custom backyard design is the process of planning and building an outdoor space around how you actually live — not around what looks good in a catalog. Done well, it turns an underused yard into a functional extension of your home that gets used daily.
—
Off-the-shelf outdoor furniture and a basic patio slab can fill a yard. Custom design goes further. It accounts for your lot’s dimensions, sun exposure, how much privacy you have, and which features you’ll realistically use.
A family with young children needs different zones than a couple who entertains frequently or a homeowner who wants a private garden retreat.
Custom doesn’t require a large lot. A 15×20 foot backyard can hold a dining area, a built-in bench with storage, and a small planting bed — if the layout is planned before anything is purchased or built.
—
Before choosing materials or furniture, decide what activities the space needs to support. Dining, lounging, cooking, gardening, and play each require different amounts of space and different surfaces.
Trying to accommodate all of them without a zone plan results in a cluttered yard where nothing works well.
Sketch a rough footprint. Assign each activity an area. Leave circulation paths between zones so the space feels open rather than jammed.
Hardscape materials set the tone and determine long-term maintenance. Concrete pavers work well for dining areas because they’re level, durable, and easy to clean.
Decomposed granite or gravel suits pathways and low-use zones. Wood decking adds warmth near a house but requires sealing every one to two years in most climates. Composite decking costs more upfront and needs far less maintenance over time.
Match the surface to how the zone will be used, not just how it looks in photos.
Built-in seating, planters, and storage eliminate the clutter that makes outdoor spaces feel disorganized. A bench built into a retaining wall doubles as seating and a structural element.
Raised planting beds integrated into a fence line keep gardening contained without sacrificing usable floor space.
Built-ins also hold up better than freestanding furniture in most climates, since they’re designed for the specific site.
Lighting is one of the most skipped steps in backyard design, and one of the most impactful. A yard without lighting becomes unusable after 7pm for most of the year.
Low-voltage path lighting, string lights on a pergola, and directional spotlights on plants or architectural features each serve different purposes.
Wire for lighting during construction or hardscaping. Running conduit under a patio after it’s poured is expensive and disruptive.
Plants define space, provide privacy, reduce heat, and reduce wind. A row of tall ornamental grasses or a bamboo screen along a fence line creates visual separation from neighbors without a wall.
Shade trees planted on the west side of a patio can reduce afternoon temperatures by 10 degrees or more.
Choose species suited to your climate and soil. Low-maintenance doesn’t mean no maintenance — it means selecting plants that thrive with minimal intervention once established.
—
A well-designed backyard increases usable living space without building an addition. Outdoor dining areas, covered lounge spaces, and cooking zones serve the same function as interior rooms at a fraction of the cost per square foot.
Resale value is a practical consideration. According to the National Association of Realtors, outdoor living improvements consistently rank among the top home projects for cost recovery.
A finished backyard with a patio, lighting, and landscaping typically returns 60 to 80 percent of its cost at resale, depending on the market.
Daily quality of life is harder to quantify but equally real. A yard designed around how you actually spend time outdoors gets used. A yard that wasn’t planned tends to sit empty.
—
Buying furniture before setting a layout leads to spaces that feel overcrowded or sparse. Scale matters. A large sectional sofa can overwhelm a small patio; undersized chairs around a dining table look disconnected.
Ignoring drainage during design is a recurring problem. Water needs somewhere to go. A patio installed without proper grading or drainage channels will pool after rain, accelerate material wear, and create a muddy perimeter.
Skipping shade planning is another. A south or west-facing patio with no overhead coverage becomes unusable on hot afternoons. A pergola, shade sail, or strategic tree placement solves this before it becomes a problem.
Overcomplicating the planting plan creates maintenance burdens that lead to neglect. A simpler plan with well-chosen species looks better over time than an ambitious design that requires constant attention.
—
How much does a custom backyard design typically cost?
Costs vary widely based on scope. A basic patio with lighting and landscaping might run $8,000 to $20,000. A fully built-out space with a pergola, outdoor kitchen, built-in seating, and mature plantings can reach $50,000 or more. The clearest way to manage cost is to prioritize structural and hardscape elements first, then add features over time.
Do I need a landscape architect or can I plan it myself?
Smaller projects with straightforward layouts are manageable without a professional. For anything involving grading, drainage, structural elements, or permits, a landscape architect or licensed contractor is worth the cost. Mistakes in grading or drainage are expensive to fix after construction.
What’s the best way to add privacy to a backyard?
The most durable options are fencing, masonry walls, and structural screens. Planted privacy screens using dense shrubs or bamboo work well but take two to four years to fill in. A combination of a solid fence with planted material in front is usually the most effective and visually appealing approach.
How long does a custom backyard project take from design to completion?
A mid-scale project — patio, lighting, basic landscaping — typically takes four to eight weeks once materials are ordered and a contractor is scheduled. Larger projects with structural elements, custom built-ins, or outdoor kitchens can take three to six months. Lead times on materials, permitting, and contractor availability are the most common causes of delay.
Custom backyard design is the process of planning and building an outdoor space around how you actually live, not around generic layouts or showroom templates. Done well, it turns underused yard space into a functional extension of your home that gets daily use.
The search intent here is primarily informational with a commercial lean. Most people looking at this topic want to understand the design process, see what’s possible, and eventually hire someone or start a project. This article covers both.
—
Most backyard projects fail before they begin because the planning skips observation. Spend time in your yard at different times of day across multiple seasons before choosing materials or layouts.
Track where sunlight falls in the morning versus late afternoon. Note where water pools after rain and where foot traffic has already worn the grass thin. These patterns tell you where a patio will actually be used, where shade structures are needed, and where drainage improvements will save you from expensive repairs later.
This phase costs nothing and prevents the most common mistakes.
—
A well-designed backyard works because each area has a clear purpose. Cooking, dining, and lounging each need different surfaces, clearances, and lighting.
Paving material changes are one of the cleanest ways to define zones without walls or fencing. A concrete pad transitions to decomposed granite, which transitions to lawn. The shift in texture signals a shift in function.
Plant borders serve the same purpose with more softness. A low hedge or a row of ornamental grasses between a dining area and a lounge creates separation without blocking sightlines or making the yard feel smaller.
Keeping these zones connected by a clear circulation path matters too. A 3-foot-wide path between zones keeps movement natural and prevents the chopped-up feeling that comes from poorly placed furniture or plantings.
—
Freestanding patio furniture is flexible but creates visual clutter and takes up more floor space than necessary. Built-in seating and planters solve both problems.
A built-in bench along a retaining wall, for example, seats six people without any additional pieces in the space. Add storage underneath and it replaces a shed worth of small items. Built-in planters at the edges of a patio define the boundary of the space while adding greenery without pots scattered around.
This approach works best when the built-ins are designed as part of the original layout, not added after the fact. Retrofitting a bench into an existing patio usually looks like exactly that.
—
Using fewer materials creates a more refined result. A backyard with three different paving materials, two fence styles, and mismatched planters looks assembled over time rather than designed.
Pick one primary hard surface material and one secondary. For example: large-format concrete pavers as the primary, with gravel or decomposed granite as the secondary. Apply those two materials consistently across the entire yard. Then choose one material for planters and raised beds, whether that’s corten steel, poured concrete, or timber, and stick with it.
This kind of restraint is what separates a yard that photographs well from one that simply has expensive components in it.
—
Outdoor spaces that only work in daylight are half-finished. Layered lighting extends the hours a space is usable and changes how the yard feels after dark.
A basic three-layer approach: overhead ambient light for the dining area, path lighting at ground level for safety and definition, and accent lighting aimed at planting beds or architectural features. Low-voltage LED systems handle all three and run off a simple timer.
Vertical elements like trellises, pergolas, and tall plantings do two things at once. They add planting area without using ground space, and they make a yard feel more enclosed and intentional without reducing the actual square footage. A pergola over a dining area creates a room-like quality that a flat open patio never achieves.
—
The practical return on a well-designed backyard includes increased property value, reduced maintenance compared to poorly planned outdoor spaces, and more consistent daily use of the space. A backyard that works with your household’s schedule and habits gets used. One that doesn’t gets ignored.
Outdoor kitchens, for example, are often cited as high-ROI additions. The caveat is that they only add value when the rest of the space supports gathering. An outdoor kitchen on an awkward, undersized patio without comfortable seating nearby doesn’t function the way the investment suggests it should.
—
Skipping drainage planning. Surface water that has nowhere to go undermines paving, kills plants, and creates standing water problems. Address slope and drainage before any hardscaping goes in.
Choosing furniture before finishing surfaces. Scale relationships matter. A sectional that looks right in a showroom can overwhelm a 12×14 patio. Always work from the space outward, not from the furniture catalog inward.
Under-lighting or over-lighting. A single flood light creates harsh shadows and makes the yard feel like a parking lot. No lighting at all means the space goes dark at 7pm. Neither extreme works.
Planting for year-one appearance. Shrubs and trees planted too close together may look full immediately but create crowding and maintenance problems within three years. Plant for mature size.
—
How much does a custom backyard design typically cost?
Project costs vary widely based on scope, materials, and region. A basic hardscape and planting project with a professional designer might run $15,000 to $40,000. Full outdoor living spaces with kitchens, lighting, and custom structures can reach $80,000 or more. Getting a site assessment before budgeting gives you more accurate numbers than any general range.
Do I need a permit for backyard work?
Permits are typically required for structures over a certain height or square footage, outdoor kitchens with gas lines, electrical work, and significant grading. Requirements vary by municipality. Check with your local building department before starting any structural or utility work.
What’s the best paving material for a backyard patio?
Concrete pavers are the most practical choice for most climates. They’re durable, replaceable if damaged, and available in a wide range of sizes and finishes. Natural stone like bluestone or travertine looks better in certain settings but costs more and requires more maintenance. Poured concrete is less expensive upfront but cracks over time and is harder to repair cleanly.
Can a small backyard be designed to feel larger?
Yes, through consistent material choices, reduced visual clutter, vertical plantings, and light-colored surfaces that reflect rather than absorb light. Defining one clear zone rather than trying to fit multiple competing areas into a small space also helps. A well-designed 400 square foot patio used intentionally feels better than a poorly organized 800 square foot space.
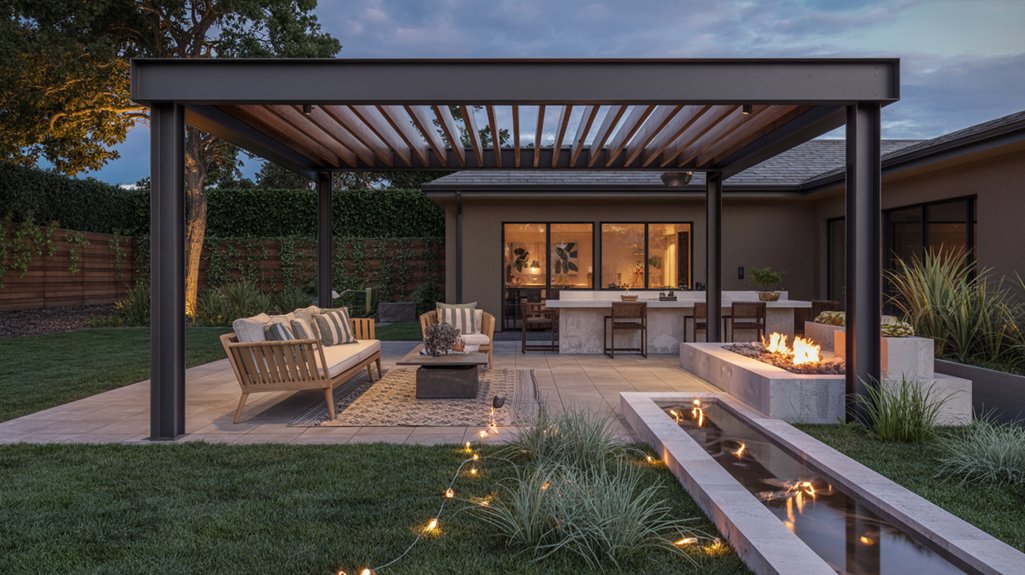
An empty backyard is harder to work with than most people expect. Without defined zones, existing structures, or even a single focal point, the space gives you nothing to react to. That absence of reference makes decision-making genuinely difficult, not because you lack taste, but because spatial imagination requires something to push against.
Blank space doesn’t simplify decisions. It removes the anchors that make decisions possible in the first place.
—
Most design decisions work by reaction. You see a sofa and decide whether it belongs near the window. You see a garden bed and decide whether it should be wider. Empty space removes those anchors entirely.
Outdoor spaces add another layer of complexity. Unlike interior rooms, backyards have irregular boundaries, grade changes, sun patterns, and drainage quirks that shift throughout the day and across seasons. You are essentially designing for a living system, not a static room.
—
Indoor spaces come with built-in constraints that quietly simplify decision-making. Walls define the room. Doors establish traffic flow. Windows tell you where light enters.
Backyards rarely offer the same structure. A flat rectangular lawn presents almost infinite layout options, which sounds like freedom but functions more like analysis paralysis. The more open the space, the harder it is to identify a logical starting point.
There is also a scale problem. Furniture and structures that look proportionate in a showroom can look undersized outdoors. A dining table that seats eight feels generous inside a home. Placed in a large backyard without surrounding structure, it can look like it was forgotten there.
—
Map how you actually use the space before choosing any features.
Observe where you naturally walk, where shade falls at different times of day, and where the ground drains poorly after rain. These patterns reveal the logic the space already has, even if it is invisible to the eye.
Identify one anchor feature first.
A pergola, outdoor kitchen, or seating area functions as a fixed point that everything else can organize around. Trying to plan all zones simultaneously is where most backyard projects stall.
Work from the house outward.
The transition from interior to exterior is the most-used area of any backyard. Getting that zone right, whether it is a covered patio, a set of steps, or a defined entry surface, makes the rest of the layout easier to sequence.
Account for what the space needs to do at night.
Lighting is consistently underplanned in backyard design. A space that works beautifully in daylight can feel unusable after dark without deliberate fixture placement.
—
Choosing materials or furniture before establishing a layout is one of the most common ways backyard projects lose momentum. It creates a situation where purchases drive design rather than the other way around.
Underestimating scale is another consistent problem. Patios are frequently built too small. A patio sized for a table and four chairs should be at least twelve by sixteen feet to allow comfortable movement. Most people go smaller and then wonder why the finished space feels cramped.
Ignoring the view from inside the home is also worth avoiding. Your backyard is visible from your kitchen, living room, and bedroom. A design that only looks intentional when you are standing in it misses half its visual impact.
—
Time spent on layout and zoning before any construction starts directly reduces cost and rework later. Moving a patio on paper costs nothing. Moving one after it has been poured is expensive and disruptive.
A clear plan also makes it easier to phase a project sensibly. If budget requires building in stages, a complete design lets you prioritize the right elements first and add to them later without visual inconsistency.
—
How do I figure out where to put a patio in an empty backyard?
Start by noting where you exit the house most often and where shade falls during the hours you spend outdoors. The intersection of convenient access and comfortable temperature is usually the right location.
What is the first thing I should build in a backyard?
The primary hardscape, usually a patio or defined ground surface near the house, should come first. It establishes scale and gives every subsequent decision a reference point.
How much of my backyard should be hardscape versus lawn or planting?
There is no fixed rule, but a common functional balance is roughly one-third hardscape, one-third planting, and one-third open lawn. Adjust based on how much maintenance you want and how you plan to use the space.
Do I need a landscape designer, or can I plan a backyard myself?
Simple rectangular spaces with straightforward goals are manageable without professional help if you are willing to research scale and drainage carefully. Irregular lots, significant grade changes, or complex features like pools and outdoor kitchens benefit from professional input.
Reading a blank yard like a designer means systematically analyzing your outdoor space before making any purchases or layout decisions. It’s a process of observation first, action second.
—
Walk your yard at different times of day. Note where sunlight falls in the morning versus late afternoon, where water pools after rain, and which areas stay shaded. These conditions are not adjustable — your design has to work around them, not against them.
Measure the yard’s actual dimensions. Eyeballing square footage leads to furniture that’s too large, paths that feel cramped, and planting beds that overwhelm the space. Sketch a rough overhead diagram, even a freehand one, so you have something concrete to work from.
Also look at what already exists. A mature oak, a fence line, an awkward slope — these are not problems to solve immediately. They’re fixed anchors that will shape everything else.
—
Every well-designed yard has at least one visual anchor: a tree worth framing, a view worth preserving, or an architectural feature worth highlighting. Identifying that anchor early prevents the common mistake of scattering interest across the whole space with no clear center.
If your yard has no natural focal point, you’ll need to create one. A specimen plant, a water feature, or a simple pergola can serve this purpose — but only if it’s placed intentionally, not wherever it happens to fit.
—
Traffic flow shapes a yard more than most people expect. Watch where family members naturally walk from the back door to the garage, from the patio to the garden, from the gate to the front entry. Those worn grass lines tell you where paths should go.
Fighting natural movement patterns means guests will cut across planting beds and furniture will end up rearranged constantly. Work with how people actually use the space.
—
Functional zoning means deciding what activities happen where before choosing a single plant or piece of furniture. A dining area needs level ground and proximity to the kitchen. A play zone needs visibility from the house. A garden bed needs reliable sun exposure.
Divide the yard into rough activity areas based on your family’s actual habits, not an idealized version of outdoor life. If no one in your household entertains large groups, don’t dedicate half the yard to a formal seating area. Prioritize the zones you’ll use most and size them accordingly.
Once zones are mapped, circulation between them becomes clear — and you can start placing hardscape, planting beds, and structures with real purpose behind each decision.
—
Skipping the observation phase. Most layout errors trace back to decisions made without watching how sunlight, drainage, and foot traffic actually behave across the space.
Treating the yard as a blank canvas. A blank yard is never truly blank. Soil type, slope, existing root systems, and neighboring structures all constrain your options before you draw a single line.
Designing for appearance over function. A yard that photographs well but floods every spring, or has a dining area that sits in full afternoon sun with no shade, fails in daily use.
Zoning after furnishing. Buying a sectional sofa before defining the seating zone almost always results in a layout that blocks circulation or wastes usable space.
—
Observation-first design reduces costly mistakes. Knowing your drainage patterns before you install a patio prevents water damage. Understanding sun exposure before planting saves you from replacing dead plants. Mapping traffic flow before laying paths means you won’t need to redo them two years later.
It also produces a yard that feels coherent rather than assembled. When zones relate to each other logically, when focal points are intentional, and when hardscape follows real movement patterns, the result reads as designed rather than accumulated.
—
How long should I observe a yard before starting to design it?
At least a few weeks across different weather conditions and times of day. If you’ve just moved in, a full season of observation will reveal things no site visit can — seasonal shade shifts, drainage issues after heavy rain, and wind patterns that affect comfortable seating areas.
Do I need professional design software to map my yard?
No. A hand-drawn overhead sketch with rough measurements is enough to start. Free tools like RoomSketcher or Canva’s floor plan templates work well if you want something more precise, but accuracy matters more than polish at this stage.
What if my yard has no obvious focal point?
Most yards don’t start with one. A single well-placed tree, a defined garden bed at the end of a sightline, or a simple structure like an arbor can create the anchor a yard needs. The goal is one clear point of visual interest, not multiple competing ones.
How do I zone a small yard without it feeling chopped up?
Use material or planting transitions instead of hard divisions. A change in paving material, a low hedge, or a shift in ground cover signals a zone change without physical barriers. In small spaces, zones should flow into each other rather than be strictly separated.
A custom backyard layout is a design built around your specific routines, not a catalog template. Instead of starting with aesthetics, it starts with behavior: where you sit, how you move through the space, and what activities you actually do outside.
Most backyards go unused because they were designed to look good, not function well. Fixing that doesn’t require a full renovation.
—
Custom doesn’t mean expensive. It means the layout reflects how your household uses the space. A family that eats outside three nights a week needs different zoning than someone who primarily uses the yard for morning coffee or weekend gardening.
The distinction matters because off-the-shelf designs assume average use patterns. Your yard should work for your specific patterns.
—
Before sketching anything, track how you currently use the space over a week or two. Note where you naturally stand, where the sun hits at what hours, where foot traffic creates worn paths, and which areas you avoid. These patterns should drive your layout decisions.
Divide the yard into functional areas based on what happens there: cooking and dining, lounging, play, gardening, or storage. Each zone benefits from its own surface treatment, furniture scale, and lighting level.
You don’t need walls or fences to separate zones. Potted plants, a change in paving material, or a gravel border can create clear boundaries without construction.
Place permanent or semi-permanent features where you spend the most time. If you host dinners outside regularly, anchor the dining zone with a fixed table and built-in seating rather than chairs that get scattered and stacked. Built-in benches around a fire pit serve the same purpose: they hold the gathering space together without crowding it.
Good layouts account for how people walk through the yard, not just where they sit. A path from the back door to the dining area should be direct and wide enough for two people to pass comfortably. Narrow paths cause people to walk through planted areas or around furniture, which gradually degrades both.
In compact yards, vertical space is underused. Trellises, wall-mounted planters, and tall narrow shrubs add planting without consuming floor area. This keeps the ground clear for movement and furniture while still providing greenery and privacy.
—
A layout designed around your habits reduces friction. You stop rearranging furniture every time you have guests. You stop walking around obstacles. Maintenance becomes predictable because plantings are chosen for your climate and soil.
Choosing native plants or low-water species cuts watering time and cost significantly. Xeriscaping, which replaces grass with drought-tolerant plants and gravel, can eliminate irrigation needs in dry climates entirely. These aren’t just environmental choices; they reduce how much time you spend maintaining the yard.
When the space is set up correctly, you use it more. That’s the practical return on a thoughtful layout.
—
Designing for photos, not use. A yard optimized for curb appeal or Instagram often has wide open lawn, minimal seating, and no shade. It looks clean but offers nothing to do.
Underestimating shade. Afternoon sun makes many yards unbearable from 1 to 5 pm. A dining area with no overhead cover will go unused during peak outdoor hours in summer.
Skipping lighting. Backyards without evening lighting stop being usable at sunset. Low-voltage path lighting and overhead string lights extend usable hours without major electrical work.
Choosing furniture that doesn’t fit the space. Oversized sectionals in a small yard block movement. Undersized chairs around a large dining table feel disconnected. Furniture should be scaled to the zone, not chosen for style alone.
Planting without a maintenance plan. High-maintenance plants in low-attention spots become overgrown problems within a season. Match plant selection to the time you realistically have for upkeep.
—
How much does a custom backyard layout cost?
It varies widely. Simple rezoning with plants, rugs, and repositioned furniture can cost under $500. Adding built-in seating, permanent structures, or professional landscaping can range from $5,000 to $30,000 or more depending on scope and materials.
Do I need a landscape designer for a custom layout?
Not necessarily. A designer adds value for complex grading, drainage issues, or large-scale projects. For straightforward rezoning and planting, a well-researched plan and a few contractor quotes can be sufficient.
What’s the best way to create zones without a fence or wall?
Surface changes work well. A wood deck or paved patio visually separates a dining zone from a lawn area. Gravel borders define garden beds. Potted plants placed in a row create a soft boundary without blocking sight lines.
How do I make a small backyard feel larger?
Vertical planting creates height without using floor space. Choosing furniture scaled to the yard prevents it from feeling cluttered. Light-colored surfaces reflect light and make the area feel more open. Avoiding too many distinct zones in a small space also helps; fewer, well-defined areas feel more intentional than many cramped ones.
A small backyard does not limit what you can build. It limits how you plan. The difference between a cramped outdoor space and a functional, polished one comes down to layout decisions made before anything gets installed.
Primary keyword: small backyard design ideas (informational intent — readers want practical guidance, not product listings)
—
Luxury in a compact outdoor space is not about square footage. It is about finish quality, spatial clarity, and the absence of visual clutter. A 200-square-foot patio with built-in seating, consistent materials, and well-placed lighting reads as more refined than a large yard with mismatched furniture and no defined areas.
The goal is to make the space feel intentional, not improvised.
—
Before selecting furniture or plants, map out what the space needs to do. A dining area, a lounge spot, and a planting zone can coexist in a small lot if each has a clear boundary. Low planters, a change in paving material, or a shift in level all create separation without consuming extra space.
Trying to fit features in first, then adjust the layout around them, is where most small backyard projects go wrong.
Walls and fences are underused in most small gardens. Vertical planters, espalier trees, wall-mounted lighting, and trellises with climbing plants add visual depth and greenery without reducing the usable floor area. A bare fence is wasted real estate.
Built-in benches along a fence line or retaining wall serve two purposes: seating and boundary definition. They also remove the visual weight of chair legs, which makes a space feel less crowded. Add storage underneath and the bench becomes three functional elements in one footprint.
The same logic applies to outdoor kitchens. A compact, built-in grill and prep counter along one wall takes less visual space than a freestanding cart placed in the middle of a patio.
Oversized furniture is one of the fastest ways to make a small backyard feel smaller. A dining table sized for eight people in a space suited for four will dominate the layout and block circulation. Measure the area first, then select furniture that fits the actual dimensions with room to move around it.
Folding or stackable pieces work well for zones that need flexibility, such as a dining area that doubles as a gathering space.
Lighting at ground level, at eye level, and overhead creates depth in a way that a single overhead fixture cannot. Recessed step lights, wall sconces at seated height, and string lights or a pergola-mounted fixture give the space dimension after dark. This also extends usability into evening hours without adding any square footage.
—
Every decision is more visible. In a large yard, an awkward furniture placement or mismatched material is easy to overlook. In a small space, it is the first thing someone notices.
Proportion, material consistency, and spatial flow carry more weight when there is less room to absorb errors. This is why small backyard projects often benefit more from planning time than large ones do.
The payoff is proportional. A well-designed compact backyard is easier to maintain, more consistently usable, and often more enjoyable than a larger space with no clear structure.
—
Centering everything. Placing a table or fire pit in the dead center of a small patio cuts the usable area into fragments. Pushing elements toward the edges opens the middle and makes the space feel larger.
Using too many materials. Three different paving types, multiple wood tones, and varied metal finishes create visual noise. Limiting the palette to two or three materials throughout the space reads as more cohesive and more considered.
Skipping shade. A small backyard with no shade becomes unusable during peak afternoon hours in warm climates. A pergola, shade sail, or well-placed tree extends the functional hours of the space significantly.
Planting without scale in mind. Large shrubs or fast-growing trees quickly overwhelm a small lot. Select plants based on their mature size, not their appearance at purchase.
—
How small is too small for an outdoor kitchen?
There is no strict minimum, but a functional outdoor kitchen typically needs at least 8 to 10 linear feet of counter and grill space. In tighter spaces, a single built-in grill with a small prep surface alongside it is more practical than a full kitchen setup.
What paving materials work best for small patios?
Large-format pavers (24×24 inches or larger) with minimal grout lines make a small patio feel more expansive. Busy patterns or small tiles draw the eye down and fragment the space visually.
Can a small backyard have a lawn and still feel open?
A small patch of lawn can work if it is a defined shape with clean edges. Irregular, narrow strips of grass are difficult to maintain and rarely add to the space aesthetically. If the area is under roughly 100 square feet, alternative ground covers or paving typically perform better.
Is vertical gardening high-maintenance?
It depends on the system. Wall-mounted planters with drip irrigation require minimal daily attention. A simple trellis with climbing plants like jasmine or clematis needs seasonal pruning but very little routine care. The maintenance level is a design choice, not an inherent feature of vertical gardening.
Small backyards don’t require compromise. With deliberate planning, a compact outdoor space can function just as well as a large one and look significantly better than most.
The primary keyword here is small lot backyard design, which targets homeowners researching how to maximize limited outdoor square footage without sacrificing comfort or aesthetics.
—
Small lot backyard design is the practice of organizing a limited outdoor area so it serves clear purposes, feels visually spacious, and holds up to regular use. It’s not about cramming in features. It’s about choosing the right ones.
Most compact backyards fail because they’re treated as leftover space rather than designed space.
—
When floor space is limited, walls and fences become usable surfaces. Wall-mounted planters, trellises, and stacked planter boxes move greenery upward, freeing ground area for furniture or pathways. This also draws the eye up, which makes the overall space feel taller and less enclosed.
A storage bench replaces both seating and a storage unit. A foldable dining table expands for entertaining and collapses when not in use. Every piece should justify its footprint.
Dividing a small yard into distinct areas, such as a dining zone and a lounge zone, creates a sense of scale and intention. Outdoor rugs and potted plants work well as low-cost dividers that don’t block sightlines or add bulk.
Overhead string lights, ground-level path lighting, and wall-mounted fixtures at different heights extend how long the space is usable each day. Layered lighting also adds depth after dark, making the yard feel more dimensional.
—
| Strategy | Example | Benefit |
|---|---|---|
| Vertical Gardening | Wall-mounted planters | Frees ground space |
| Multi-functional Furniture | Storage benches | Reduces clutter |
| Defined Zones | Outdoor rugs, potted plants | Creates structure |
| Smart Lighting | Layered ambient lights | Extends usable hours |
—
Oversizing furniture. A large sectional sofa in a small yard blocks movement and makes the space feel smaller, not cozier. Scale matters more in compact areas than in large ones.
Ignoring the perimeter. Most people design inward and leave the edges bare. Using fence lines for planters, lighting, or vertical elements activates dead space.
Too many focal points. In a tight space, competing features create visual noise. One strong focal point, whether a water feature, a fire pit, or a statement plant, anchors the design without overwhelming it.
Skipping a floor plan. Arranging furniture by feel rarely works in small spaces. Sketching a rough layout to scale before purchasing anything saves time and money.
—
Limited space forces prioritization. When every square foot has to earn its place, the result is a yard where everything is used, nothing is wasted, and the overall composition holds together. Large backyards often suffer from the opposite problem: too much space, too little cohesion.
A well-designed small backyard typically costs less to build, less to maintain, and delivers a higher return on investment than a sprawling yard with no clear structure.
—
How small is too small for a functional backyard design?
Most design principles apply to any space above roughly 100 square feet. Below that, the focus shifts almost entirely to vertical elements and container planting, but a usable outdoor area is still achievable.
What’s the best flooring for a small backyard?
Large-format pavers or composite decking in a consistent color extend the visual plane and make the space feel larger. Busy patterns and small tiles do the opposite.
Can a small backyard include a dining area and a lounge area?
Yes, with careful zoning. A four-person dining set and two lounge chairs can coexist in roughly 200 square feet if the layout is planned deliberately and furniture is appropriately scaled.
Does vertical gardening work in shaded backyards?
It depends on plant selection. Ferns, hostas, and pothos varieties thrive in low light and work well in wall-mounted planters. A shaded wall is not a barrier to vertical gardening, only a filter for plant choice.
Strategic space maximization refers to the deliberate use of layout, vertical space, furniture, and light to make a small outdoor area function like a larger one. The goal is not to add square footage but to use what exists more efficiently.
This applies most directly to compact backyards, urban patios, and narrow side yards where space is fixed but usability can still be improved significantly.
—
A poorly arranged large yard often feels cramped. A well-organized small yard can feel open and functional. The difference comes down to zone definition, sightlines, and how elements are layered.
When every object, plant, and seating area competes for the same flat plane, the space reads as cluttered. Organizing the yard into distinct areas, even loosely, gives the eye a clear path and makes the space feel intentional.
—
Raising a dining platform six to twelve inches above the surrounding patio creates a visual boundary without a wall or fence. Sunken seating areas work the same way in reverse. The level change signals a zone shift and adds depth that a flat layout cannot achieve.
Decking materials, gravel borders, or planted raised beds all serve this function. The material choice matters less than the height difference itself.
Wall-mounted planters, trellises with climbing plants, and tiered shelving keep greenery off the ground entirely. This preserves floor space for furniture and movement while maintaining visual density, which makes a small yard feel lush rather than sparse.
A bare fence line is wasted vertical real estate. A trellis planted with jasmine or climbing roses adds height, scent, and privacy without occupying a single square foot of ground.
A storage bench seats guests and holds cushions, tools, or outdoor supplies. A folding table expands for a dinner party and collapses against a wall when not in use. Built-in seating along a low retaining wall eliminates the need for freestanding chairs that consume floor space even when unused.
Scale matters here. Oversized furniture in a small yard shrinks the visible space. Pieces sized to the actual area, rather than the aspirational one, always read better.
Small spaces benefit from a single strong focal point: a compact fire bowl, a wall-mounted water feature, or a large container plant placed deliberately. One anchor draws the eye and stops the space from feeling scattered.
Ambient lighting, particularly string lights at canopy height or low-voltage ground lighting along paths, extends usability into the evening and makes boundaries less abrupt. Hard edges soften under warm light, which makes even a tight space feel more expansive.
—
—
Overcrowding with furniture. More seating does not mean more usability. Four chairs that fit comfortably work better than six that make movement awkward.
Ignoring the vertical plane. Most small yard designs treat the space as two-dimensional. The fence, walls, and overhead area are available and underused.
Using too many focal points. A fire feature, a fountain, a sculpture, and a specimen tree in a 200-square-foot yard create visual noise. One strong element is enough.
Choosing furniture for aesthetics over scale. A sectional that looks good in a showroom can consume an entire small patio. Measure the footprint before purchasing.
—
How do I define zones in a small backyard without using fences or walls?
Level changes, flooring material transitions, and planted borders all mark zones without physical barriers. A gravel dining area beside a grass lounging space reads as two distinct zones even without a dividing structure.
What is the minimum size for a functional outdoor dining area?
A table for four requires roughly 10 by 10 feet to allow comfortable movement around it. In tighter spaces, a wall-mounted fold-down table and bench seating reduce the footprint without eliminating the function.
Do vertical gardens work in shaded yards?
Some do. Ferns, hostas, ivy, and certain climbing hydrangeas tolerate low light. The plant selection has to match the light conditions, but vertical gardening as a technique is not limited to sunny exposures.
Is built-in furniture worth the cost in a small yard?
For a permanent residence, yes. Built-in benches and planters eliminate the need to store or replace freestanding pieces and typically make better use of awkward corners and edges that movable furniture cannot fill efficiently.
Small lots create real design constraints, but they don’t prevent genuinely high-end results. A compact backyard can feel spacious, polished, and worth spending time in when the layout and materials are chosen with intention rather than compromise.
Luxury in a small backyard means designing for quality over quantity. Instead of cramming in features, the goal is to select fewer, better elements that work together and make the space feel deliberate. That shift in approach is what separates a crowded patio from one that feels expensive.
—
Most compact outdoor spaces fall short for predictable reasons. Everything sits on a single flat plane, which removes any sense of depth. Materials are inconsistent, furniture is oversized, and the transition from inside to outside feels abrupt. Lighting is an afterthought, if it exists at all.
None of these are space problems. They’re design problems, and they’re fixable.
—
A single-level patio reads as one room. Adding a raised deck section, a sunken seating area, or even a slight grade change gives different parts of the yard a distinct purpose. The eye reads this as separate spaces, which makes the overall footprint feel larger.
A raised dining platform with a pergola overhead, for example, frames the eating area without a wall. That definition makes both the dining zone and the surrounding lawn feel more intentional.
Ground space is limited. Vertical space usually isn’t. Trellises, wall-mounted planters, trained climbers, and tall ornamental grasses all draw the eye upward and introduce greenery without taking up square footage. A living wall or a simple cedar trellis with jasmine costs less than most hardscape additions and delivers more visual impact per square foot than almost anything at ground level.
Using three or four different paving materials, railing styles, and furniture finishes in a small space creates visual noise. The yard looks smaller and busier than it is. Picking one primary hardscape material, such as large-format porcelain tile or natural bluestone, and carrying it through the entire space creates continuity. That continuity reads as sophistication.
The same principle applies to furniture. Matching powder-coat finishes or sticking to one wood tone keeps the space from looking assembled from different sales and different years.
Where the house meets the yard matters more on a small lot than on a large one, because that threshold is a bigger proportion of the total space. Sliding or folding glass doors that open fully, a matching floor material carried from inside to out, or simply aligning indoor and outdoor furniture sight lines makes the backyard feel like an extension of the house rather than a separate, smaller area attached to it.
Built-in seating along a fence line or retaining wall eliminates the visual weight of chair legs and frames. A built-in outdoor kitchen with clean cabinetry takes up less apparent space than a collection of freestanding grills, carts, and coolers. Multi-use pieces, like a bench with storage underneath or a dining table that doubles as a prep surface, reduce the total number of objects without reducing function.
A single overhead fixture leaves most of the yard in shadow and makes the space feel smaller after dark. Layered lighting uses at least three types: path or ground-level lights for safety and depth, uplighting on trees or architectural features for drama, and ambient string lights or lanterns for warmth. Together, they define the space at night without requiring any additional square footage.
—
A well-designed compact outdoor space increases usable living area without adding square footage to the house. For urban and suburban properties where indoor space is already limited, a functional backyard that works in multiple seasons adds genuine daily value.
Resale value is also a factor. Buyers in markets with smaller lots respond strongly to outdoor spaces that feel finished and livable rather than neglected or awkward. A cohesive, well-lit patio with quality materials signals that the property has been maintained with care.
Beyond finances, the practical benefit is simple: a space designed this way actually gets used. Cluttered, poorly laid-out yards get ignored.
—
Overscaling furniture. A large sectional sofa that fits a 400-square-foot living room will overwhelm a 200-square-foot patio. Measure before purchasing and prioritize pieces designed specifically for compact outdoor use.
Ignoring the fence line. Plain fence panels are wasted space. Mounting planters, adding a trellis, or applying a consistent stain color turns a boundary into a design element.
Skipping the lighting plan. Most homeowners add one or two lights and call it done. A three-layer approach takes planning but transforms how the space feels after 6 p.m.
Mixing too many materials. Every additional paving type, railing style, or furniture finish adds visual complexity. In a small space, complexity reads as clutter.
Treating plants as filler. Randomly placed potted plants without consistent containers or a clear arrangement pattern look unfinished. Grouping by container style, or committing to a single container material throughout, ties plantings into the overall design.
—
Can a small backyard support a full outdoor kitchen?
Yes, with the right layout. A linear built-in kitchen along one wall, with a grill, a countertop, and under-counter storage, takes up less floor space than most people expect and keeps the rest of the yard open. The key is avoiding freestanding equipment, which clusters and crowds.
What’s the most cost-effective luxury upgrade for a compact yard?
Lighting delivers the highest return relative to cost. A well-executed layered lighting plan, which can often be installed for a few hundred dollars in materials, changes how the space looks and feels after dark more than almost any other single investment.
How do you make a small backyard feel private without adding bulk?
Vertical plantings, such as columnar trees, tall grasses, or trained climbers on a trellis, create a sense of enclosure without the weight of a solid fence or wall. A pergola overhead adds a ceiling reference that reinforces privacy without blocking light or sightlines.
Does consistent material choice really make that much of a difference?
In a small space, yes. Visual clutter from mismatched materials compresses the perceived size of the yard. Limiting the palette to one or two primary materials, repeated consistently across paving, edging, and built-in elements, makes the space read as larger and more composed than it actually is.
A resort-style backyard combines intentional design, quality materials, and layered amenities to make outdoor living feel like a destination rather than an afterthought. The goal is not replication of a hotel aesthetic but creating a space that functions well, looks considered, and encourages people to spend time outside.
—
The defining quality of a resort-style backyard is that it separates functional zones while keeping the overall space connected. A pool area flows into a lounge area. A kitchen connects to a dining space. Nothing feels isolated or tacked on.
This requires planning before purchasing. Materials, scale, and placement decisions made early determine whether the finished result feels cohesive or like a collection of unrelated purchases.
—
A tiered or infinity-edge pool immediately changes how a backyard is perceived. The movement of water, whether from a spillway, fountain wall, or raised spa overflow, adds sound and visual texture that flat pools cannot match.
For smaller yards, a freestanding water feature or raised plunge pool can achieve a similar effect without requiring a full excavation footprint.
A custom fire pit or linear gas fireplace extends outdoor use into cooler months and creates a defined gathering area at night. Built-in fire features, particularly those integrated into seating walls or outdoor structures, read as permanent and intentional rather than portable and seasonal.
Combining fire and water in the same design, such as a fire bowl positioned near a pool, creates contrast that most resort spaces use deliberately.
A basic grill setup is not the same as an outdoor kitchen. Resort-style outdoor kitchens include a refrigerator, prep counter, storage, and often a bar overhang with seating. Stone, concrete, or tile finishes that match the house exterior tie the kitchen into the overall design.
A separate bar area with a sink and built-in cooler allows hosting without constant trips indoors, which is what makes an outdoor kitchen functionally different from just cooking outside.
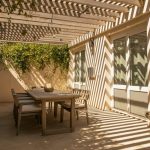
Pergolas, sail shades, and covered outdoor rooms define space and make it usable during peak sun hours. A pergola with a louvered roof system adds the most flexibility, allowing full sun, filtered light, or complete rain coverage depending on conditions.
Without shade, most outdoor spaces go unused between 11 a.m. and 4 p.m. in warmer climates. Shade structures solve that problem and also anchor furniture arrangements in a way that open-air layouts often lack.
Layered lighting transforms a backyard after dark. Path lighting, uplighting on trees or architectural elements, underwater pool lighting, and task lighting at cooking areas serve different purposes and should be planned separately.
A single string of bistro lights is not a lighting plan. Resort-style lighting uses multiple fixture types at varying heights to create depth. Low-voltage LED systems controlled by a timer or smart switch make this practical to maintain.
—
Start with how the space will be used. A family with children prioritizes different features than a couple who primarily entertains adults. The features chosen should reflect actual use patterns, not aspirational ones.
Map zones before selecting features. Identify where dining, lounging, cooking, and play will occur. Assign each zone enough square footage to function comfortably, then design features around those zones rather than placing features and hoping zones emerge.
Select a material palette and hold to it. Two or three materials used consistently across the space (travertine, stucco, and teak, for example) read as designed. Six different materials read as accumulated over time. Consistency of material is one of the clearest signals that a space was planned.
Layer the project if budget requires it. A pool, outdoor kitchen, and pergola do not need to be built simultaneously. A good landscape designer can develop a master plan that allows phased installation without rework. Building a patio to a size that accommodates a future pergola is cheaper than demolishing and expanding later.
—
Pre-fabricated outdoor furniture sets and off-the-shelf pergola kits work for some applications, but they rarely produce the result that photographs or functions like a resort space. Custom features are sized to the yard, matched to the architecture, and built from materials selected for durability in the local climate.
Custom fire pits and outdoor kitchens can also be built to meet local code requirements from the start, avoiding the permitting complications that sometimes arise with portable or modular installations.
The functional lifespan of custom stonework, concrete, or tile is significantly longer than powder-coated steel or composite prefabs. Over ten to fifteen years, the cost difference often narrows.
—
Undersizing the patio. A patio that fits furniture but leaves no circulation space feels cramped immediately. Allow at least three feet of clearance around furniture groupings.
Skipping drainage planning. Water management is one of the most common afterthoughts in backyard renovations. Poor drainage causes erosion, standing water, and eventually structural damage to hardscaping. It should be addressed in the initial design, not corrected after the fact.
Installing a pool without shade. A pool with no shaded seating area nearby limits how long people stay outside. The pool and the lounge area work as a pair.
Choosing features for appearance only. An outdoor fireplace that requires a fire marshal permit for every use, or a kitchen without adequate ventilation, becomes a liability rather than an asset. Verify local codes before finalizing any fire or cooking feature.
Overprogramming a small space. Fitting every desirable feature into a limited footprint produces a backyard that feels cluttered rather than resort-like. Fewer well-scaled features outperform many cramped ones.
—
How much does a resort-style backyard typically cost?
The range is wide. A pool, pergola, outdoor kitchen, and lighting package in most U.S. markets runs between $80,000 and $250,000 depending on size, materials, and regional labor costs. Individual features can be added incrementally to spread costs over several years.
Do resort-style features increase home value?
Outdoor improvements generally add value, though not always dollar for dollar. A well-designed pool and outdoor living area in a market where those features are expected can improve both sale price and time on market. In markets where pools are uncommon, the return is less predictable.
What permits are typically required?
Most pools require a building permit. Outdoor kitchens with gas lines and fire features connected to gas usually require permits as well. Pergolas and shade structures often require permits above a certain square footage. Requirements vary by municipality, so check with the local building department before starting any project.
Can a small backyard achieve a resort feel?
Yes. Scale matters more than size. A small yard with a plunge pool, built-in bench seating, a single shade structure, and well-planned lighting reads as intentional and complete. The mistake is trying to include every feature regardless of fit. One or two well-executed elements in a small space work better than five underdeveloped ones.
Water and fire elements have become two of the most requested features in residential landscape design. When combined thoughtfully, they create a backyard that feels expensive, functional, and comfortable across seasons. This guide covers how layered water features and fire elements work together, what to prioritize in design, and what to avoid.
—
Layered water design refers to stacking or sequencing water movement at different elevations, such as a waterfall feeding into a pool, or a raised pondless feature flowing into a lower basin. Fire elements, typically a fire pit or fire bowl, are placed within the same outdoor zone to create visual and sensory contrast.
The pairing works because water reflects light and produces ambient sound, while fire draws the eye and generates heat. Each element offsets what the other lacks.
—
An infinity edge pool creates the illusion that water extends to the horizon. It works best on sloped lots where the overflow edge faces an open view. Installation requires a catch basin below the vanishing edge and a recirculation pump, so site conditions matter significantly.
A stacked stone or precast waterfall can be built into an existing slope or constructed as a freestanding feature. Water drops from one level to the next, producing sound that masks traffic noise and adds a layer of privacy. Height and flow rate determine how loud the feature is, which affects placement relative to seating.
For smaller yards or lower maintenance preferences, a pondless waterfall recirculates water into an underground reservoir. There is no standing water, which reduces mosquito risk and eliminates the need for fish maintenance.
—
In-ground fire pits sit flush with the patio surface and work well in formal or minimalist designs. Above-ground fire pits with stone or concrete surrounds are more flexible and can serve as a visual anchor in the yard.
Gas fire pits ignite instantly, produce no ash, and allow flame control. Wood-burning pits produce more heat and a stronger sensory experience but require ongoing fuel and cleanup. Local ordinances sometimes restrict wood-burning fires, so check before building.
A fire pit placed too close to a waterfall or pool can create conflict between the heat and moisture. A spacing of 10 to 15 feet typically keeps both features functional without interference, while still maintaining a visual connection between them.
—
The design goal is contrast, not competition. Water should be positioned to catch light from the fire without being so close that steam or spray becomes an issue. A common layout places the water feature at one end of the patio and the fire pit at the other, with seating arranged to face both.
Elevation changes help. A raised waterfall behind lower seating lets the water act as a backdrop, while a ground-level fire pit anchors the front of the space. This layering creates depth without requiring a large footprint.
Lighting extends both features after dark. Submersible LED lights inside the water feature intensify the reflection of firelight. Path lighting between the two zones ties the space together without over-illuminating it.
—
Outdoor living space becomes usable for more hours and more months when fire provides warmth. Water features add sound that improves privacy and reduces ambient noise from neighboring properties. Together, they increase perceived property value and make the backyard a destination rather than just a yard.
From a design standpoint, the combination allows for a focal point at every angle. From a practical standpoint, both features can be integrated with automated controls, timers, and smart home systems for easy daily use.
—
Placing a fire pit directly downwind of a waterfall creates smoke and mist overlap that makes seating uncomfortable. Test wind patterns in your yard before finalizing placement.
Oversizing the water feature relative to the yard makes the space feel cluttered. A modest cascade with good sound is more effective than an oversized waterfall that dominates everything else.
Using incompatible materials between the two features disrupts visual cohesion. Matching stone types, concrete finishes, or color tones between the fire pit surround and the waterfall construction ties the design together.
Skipping permits is a frequent mistake. Fire pits above a certain BTU rating and water features connected to plumbing or electrical systems typically require permits and inspections.
—
Can a fire pit and water feature be on the same patio?
Yes. Most residential patios can accommodate both. The key factors are spacing, wind direction, and ensuring each feature has its own dedicated zone rather than being crowded together.
What is the best water feature to pair with a fire pit?
A pondless waterfall or a small cascading feature works well because it produces sound and movement without the maintenance demands of a full pond or pool. Infinity pools also pair effectively in larger yards.
How much does it cost to install both features?
Costs vary widely by region and materials. A basic gas fire pit installation runs between $1,500 and $5,000. A pondless waterfall can range from $3,000 to $10,000 depending on size. Custom infinity pools start around $50,000. Budget for both features together and factor in electrical and plumbing rough-in costs.
Do water and fire features require a lot of maintenance?
Gas fire pits require minimal upkeep beyond annual inspections. Water features need pump cleaning, seasonal winterization in cold climates, and occasional algae treatment. Neither is high-maintenance when properly installed, but both are easier to maintain with professional annual servicing.
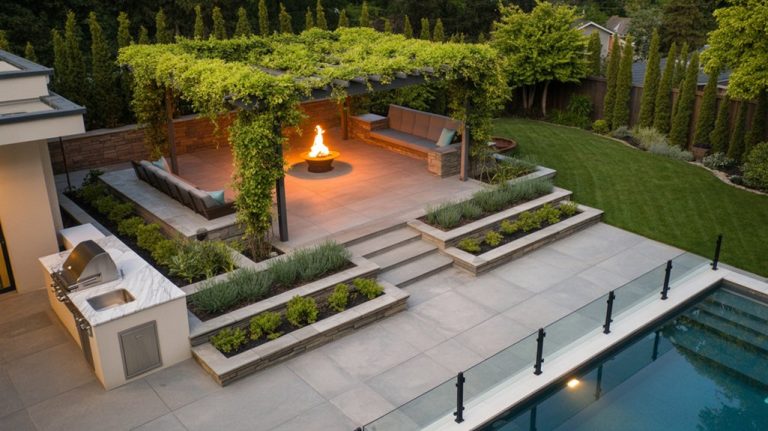
An elevated outdoor living zone is a backyard design approach that uses grade changes, raised platforms, and tiered layouts to create separate functional areas at different heights. The result is a yard that feels structured and intentional, closer in atmosphere to a resort terrace than a standard patio.
Search intent here is primarily informational with commercial undertones. Most people researching this topic are planning a renovation or new build and want to understand design options, materials, and what the finished space can realistically look like.
—
Flat yards default to a single undifferentiated space. Raising one section by even 18 to 24 inches changes how the entire yard reads. A lounge area on an upper platform overlooks a lower pool deck. A fire pit zone sits recessed below a kitchen terrace. Each level gets a clear purpose, and the transitions between them become design features rather than afterthoughts.
This approach also solves practical problems. Sloped lots that would otherwise require extensive grading can be worked into the design rather than flattened. Retaining walls become seating walls. Grade changes become steps with integrated lighting.
—
A two-tiered pool layout is one of the most common applications. The upper tier typically holds a shallow beach-entry zone or a spa. The lower tier transitions into a lounge or fire pit area. Water spills between levels, adding sound and movement without requiring a separate water feature.
Permanent seating built into retaining walls or platform edges eliminates the need for furniture that shifts over time. A custom outdoor kitchen on an elevated terrace keeps the cook at eye level with guests seated below, which improves both sightlines and conversation flow.
Layered lighting is what makes elevated zones usable after dark. Step lights handle safety. Uplighting on retaining walls adds depth. Recessed deck lighting keeps surfaces visible without washing out the atmosphere. Each level gets its own lighting logic rather than a single overhead fixture trying to cover everything.
—
Natural stone and hardwood decking are the standard combination for elevated outdoor spaces because both handle the structural and aesthetic load. Stone retaining walls and coping carry weight, resist freeze-thaw cycles, and develop a weathered quality that improves with age. Hardwood or composite decking on raised platforms stays warm underfoot and complements stone without competing with it.
Concrete pavers offer a lower-cost alternative with consistent sizing that simplifies installation on tiered layouts. Large-format porcelain tiles work well in warmer climates but can become slippery and crack in areas with hard freezes.
—
Assess the existing grade. Before any design work, document how much the yard slopes and in which direction. A surveyor or landscape architect can produce a topographic reading that informs every decision that follows.
Define the zones first. Decide which activities belong on each level before selecting materials or dimensions. Dining, lounging, swimming, and cooking each have different space requirements and relationships to each other.
Work out transitions. Steps and ramps between levels need to meet code minimums for tread depth and riser height. Steps wider than four feet feel generous. Narrower than that and they start to feel like a fire exit.
Integrate utilities early. Gas lines for fire features, electrical for lighting and appliances, and plumbing for outdoor kitchens all need to be roughed in before platforms are built. Retrofitting utilities into a finished elevated structure is expensive and often disruptive.
Specify materials for the full surface. A mix of stone, wood, and concrete across levels works well when a single finish ties them together, typically through consistent grout color, stone type, or wood tone.
—
Elevated zones add usable square footage without expanding the home’s footprint. A raised platform over a sloped section of yard converts otherwise awkward terrain into a defined outdoor room.
Separation between zones also improves how the space functions during gatherings. Guests with drinks on the upper terrace are not walking through the pool area. Children in the pool are visible from the kitchen terrace without adults being underfoot near the water.
Resale value follows. A well-built elevated outdoor space with permanent structures, lighting, and kitchen infrastructure is a differentiator in most residential markets.
—
Underbuilding the structural base. Elevated platforms need proper footings, especially in climates with frost. A deck that moves or settles will crack stone coping and create uneven steps. Pour footings to the frost line, not just to what looks sufficient.
Ignoring drainage. Water has to go somewhere. Elevated platforms that drain toward the house foundation or collect water between tiers create long-term damage. Build in slope and drainage channels at the design stage.
Scaling levels too small. A raised lounge area that fits one sofa and nothing else feels cramped rather than intimate. An upper platform for a seating group needs a minimum of 12 by 12 feet to function comfortably, with 16 by 16 being more realistic for four to six people.
Treating each level as visually independent. Levels that use completely different materials, colors, and styles look disconnected. Repeating at least one material or finish across all levels creates coherence.
—
How much does an elevated outdoor living zone typically cost?
Costs vary significantly based on materials, structural complexity, and region. A basic two-tier platform with stone steps and simple lighting might run $25,000 to $50,000. A full build with a pool, outdoor kitchen, fire feature, and custom lighting can reach $150,000 or more. The largest cost variables are stone selection and the extent of utility work required.
Do I need a permit to build a raised outdoor platform or deck?
In most jurisdictions, yes. Any raised structure above a certain height (often 30 inches above grade) requires a building permit. Projects involving electrical, gas, or plumbing connections require additional permits regardless of height. Check with your local building department before starting design work.
What’s the best material for retaining walls in a tiered backyard?
Natural stone, concrete block, and poured concrete are the most durable options. Natural stone (limestone, bluestone, granite) looks the best and lasts the longest but costs more. Concrete block is the most economical for large walls. Poured concrete works well where you need precise forms or want to integrate seating directly into the wall surface.
How do I keep an elevated outdoor space from feeling exposed or uncomfortable?
Height can create a sense of exposure if there’s no enclosure. Pergolas, shade sails, or planted screens on upper levels address this without eliminating the view. Strategic planting along the perimeter of each level also softens the visual transition between grades and adds privacy without requiring a fence.
Immersive outdoor lighting uses layered light sources, sound elements, and fire features to make a backyard feel intentional and inviting after dark. It goes beyond floodlights or a single patio fixture. The goal is an environment where every element works together.
—
Most backyards rely on one or two light sources. Immersive lighting uses multiple layers, each doing a specific job. Ambient light sets the overall brightness. Task lighting covers functional areas like cooking stations or steps. Accent lighting draws attention to focal points like trees, water features, or architectural details.
When these layers combine with sound and warmth from fire, the space stops feeling like a yard and starts feeling like a destination.
—
Uplighting directs light upward from ground level, typically at trees, shrubs, or exterior walls. It creates depth and makes the space feel larger at night than it does during the day.
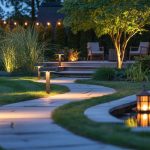
Pathway lighting serves a dual purpose. LED fixtures along walkways improve safety and add a low warm glow that softens the overall environment. Keep them spaced evenly and pointed downward to avoid glare.
String lights work particularly well over seating areas or pergolas. They create a ceiling effect that makes open spaces feel enclosed and comfortable.
Downlighting from overhead structures mimics natural moonlight when placed high in trees or on pergola beams. This technique fills in shadows without washing out the more dramatic accent lighting below.
—
A fountain or water feature introduces consistent ambient sound that masks street noise and creates a calming baseline for the space. Even a small recirculating fountain near a seating area makes a measurable difference in how relaxed the environment feels.
Fire features, whether a built-in fire pit, a freestanding bowl, or a linear gas burner, function as both a heat source and a visual anchor. They draw people toward a central gathering point and provide flickering light that no artificial fixture replicates cleanly.
—
A well-designed lighting scheme extends how long the space gets used each day. Evenings that previously ended at sunset become usable for hours more. Property value increases when outdoor living areas are finished and functional.
Energy efficiency is also worth noting. LED fixtures across all three lighting layers typically consume a fraction of what older halogen or incandescent outdoor lighting required, with longer lifespans and lower maintenance.
—
Overlighting is the most frequent problem. Too many fixtures at the same brightness level flatten the space and eliminate the contrast that makes accent lighting effective. Fewer, well-placed lights outperform a large quantity of poorly positioned ones.
Ignoring color temperature is another issue. Mixing warm (2700K–3000K) and cool (5000K+) bulbs in the same space creates visual inconsistency. Warm temperatures work better for residential outdoor environments.
Placing pathway lights too close together reduces the guiding effect and creates a runway appearance rather than a natural, gradual lit path.
—
How many lighting layers does an outdoor space actually need?
Three layers, ambient, task, and accent, cover most residential spaces. Smaller areas may only need two. The priority is intentionality, not quantity.
What is the best light color temperature for backyard ambiance?
Warm white in the 2700K to 3000K range suits most outdoor living areas. It reads as natural and comfortable without the clinical quality of cooler temperatures.
Can landscape lighting be added incrementally, or does it need to be planned all at once?
Planning the full layout upfront is strongly advisable. Running conduit and low-voltage wiring during an initial installation makes future additions much easier and avoids disrupting finished landscaping.
Do fire features require professional installation?
Gas-connected fire features should always be installed by a licensed professional. Wood-burning pits and freestanding bowls have fewer code restrictions but should still comply with local fire ordinances regarding setback distances from structures.
Few backyard upgrades deliver the combination of daily use, visual impact, and long-term property value that pools, fire features, and water elements do. If you’re weighing where to put serious money in an outdoor renovation, these three categories consistently outperform decorative-only additions.
—
A luxury water or fire feature isn’t just aesthetic. It changes how you use your outdoor space, how often you use it, and what it looks like to buyers if you ever sell. Custom pools, fire pits, outdoor fireplaces, fountains, and waterfalls are considered permanent improvements, and when built with quality materials, they hold their value better than furniture or plantings.
—
An infinity-edge pool creates the illusion that water extends to the horizon, making it particularly effective on elevated or sloped lots. Beach-entry pools, which slope gradually into the water like a natural shoreline, are practical for families with young children and visually distinctive. Plunge pools are a compact alternative for smaller yards, offering a premium experience without requiring a large footprint.
Pool construction costs vary widely depending on size, shape, finish material, and site conditions. Gunite and shotcrete shells last longer than vinyl liners but cost more upfront. Saltwater systems reduce chlorine exposure and lower ongoing chemical costs, though the initial equipment investment is higher. Permits are required in most jurisdictions, and setback rules from property lines and structures affect placement options.
Lighting built into the pool shell, rather than added after the fact, produces a cleaner look and is easier to maintain. LED systems with color control are now standard in custom builds and significantly change how the pool reads at night.
—
A well-placed fire feature makes outdoor spaces usable on cool evenings from early spring through late fall. In milder climates, it extends outdoor entertaining nearly year-round. This isn’t a minor benefit — it directly increases how much value you extract from the rest of your outdoor investment.
Gas fire pits and fireplaces offer convenience and consistent flame without ash cleanup. Natural gas connections cost more to install but eliminate the need to manage propane tanks. Wood-burning options produce more heat and a traditional ambiance, but require access to firewood and more regular cleaning. Local fire codes may restrict wood-burning features in certain areas, so check before specifying materials.
A fire feature positioned near a seating area but away from low-hanging branches or wood structures performs better and lasts longer. Stone, concrete, and steel are the most durable materials for outdoor fire construction. Stucco finishes applied over concrete block are common in warm climates but can crack in freeze-thaw cycles; cast stone or natural stone holds up better across climate extremes.
—
Moving water masks ambient noise from traffic or neighbors, which is a practical benefit often underestimated during planning. It also creates consistent visual motion that static landscaping can’t replicate. Ponds, when designed with the right depth and filtration, attract birds and pollinators and support low-maintenance aquatic planting.
A waterfall integrated into a pool’s rock surround or raised wall serves both an acoustic and visual purpose. The sound reduces the perception of street noise. Visually, it adds vertical interest and a point of focus. Standalone pondless waterfall systems are an option for yards where a full pond isn’t practical — water recirculates through a buried reservoir, eliminating standing water maintenance concerns.
Wall-mounted and freestanding fountains work well in smaller spaces or courtyards. They require a water source and a recirculating pump, and the pump should be accessible for seasonal maintenance. In colder climates, fountains need to be drained or winterized to prevent freeze damage to the basin and plumbing.
—
Properties with professionally designed and installed pools in warm-climate markets typically see a measurable return on investment at sale, particularly in neighborhoods where pools are common and expected. Fire features and water elements are more difficult to quantify at resale, but they consistently appear in luxury real estate listings as selling points and support higher asking prices relative to comparable properties without them.
Beyond resale, the more direct value is use. A pool that gets used three months a year costs more per use than one in a climate where it runs six months. This should factor into decisions about heated pools or pool enclosures in shorter-season regions.
—
Undersizing the pool for intended use. A pool that looks proportionate in a rendering can feel cramped once built. If lap swimming or regular family use is the goal, err toward more length rather than less.
Choosing materials based on appearance alone. Travertine tile looks excellent around a pool but becomes extremely slippery when wet unless textured or honed. Concrete decking is more forgiving and easier to repair.
Skipping professional hydraulic design for water features. Pump sizing, pipe diameter, and head pressure calculations affect how a waterfall or fountain actually performs. Undersized pumps produce weak flow; oversized ones create excessive noise and wear out faster.
Installing a fire feature without considering wind patterns. A fire pit placed downwind of the primary seating area pushes smoke toward guests. Walk the site at different times of day before finalizing placement.
Treating lighting as optional. Lighting around water and fire features is both a safety requirement and an extension of the design. It should be planned during the build, not retrofitted later.
—
Does a pool increase home value in every market?
Not automatically. In warm-climate markets where pools are expected, a quality pool generally supports a higher sale price. In colder regions, buyers sometimes view a pool as a maintenance liability. Local comparable sales data is the best guide.
What’s the most low-maintenance water feature?
Pondless waterfall systems require the least ongoing maintenance. They have no standing water, which eliminates algae and mosquito concerns, and the recirculating pump is the only mechanical component to service.
How long does a gunite pool last?
A gunite shell can last 50 years or more. The finish applied to the shell — plaster, pebble, or tile — typically needs resurfacing every 10 to 15 years depending on water chemistry and use.
Can a gas fire feature be converted to wood-burning later?
No. Gas and wood-burning fireplaces and fire pits have fundamentally different combustion chambers, venting requirements, and clearances. Conversion is not a practical retrofit — they need to be built for the intended fuel source from the start.
Outdoor ambiance after dark comes down to two things: how you light a space and what you grow in it. Get both right, and your backyard becomes usable, attractive, and atmospheric well past sunset.
Primary keyword: outdoor lighting and plants for nighttime ambiance
—
Ambiance after dark is the combined effect of controlled light levels, shadow, fragrance, and visual texture. It is not just adding string lights or a solar path lamp. A well-designed nighttime garden uses light to define zones, draws the eye to specific features, and incorporates plants that perform after sunset through scent, pale flowers, or reflective foliage.
—
Layered lighting means using multiple light sources at different heights and intensities rather than relying on one overhead fixture or floodlight. Each layer serves a distinct purpose.
Ambient lighting provides overall, low-level illumination. Wall-mounted lanterns, recessed deck lights, and string lights strung between posts all fall into this category. The goal is enough light to move safely without washing out the atmosphere.
Accent lighting draws attention to specific features: a sculpted shrub, a water feature, a stone wall. Low-voltage uplights placed at the base of a plant or structure work well here. Narrow beam angles (15 to 30 degrees) keep the focus tight.
Task lighting covers functional areas: stairs, grilling stations, seating areas where people read or eat. These need more brightness than accent fixtures but should still be shielded to prevent glare.
The mistake most people make is stopping at ambient. Without accent and task layers, the space looks flat or feels like a parking lot.
—
Placing a fixture at ground level and angling it upward onto a tree trunk or tall shrub creates dramatic shadow patterns on walls or fences behind the plant. It works especially well with ornamental grasses and Japanese maples.
Mounting a fixture high in a tree and directing it downward mimics natural moonlight. The light filters through leaves and casts dappled shadows on the ground. This is one of the most naturalistic techniques available and works without any special equipment beyond a well-placed directional fixture.
Low bollard lights or stake fixtures along a path serve safety and aesthetics. Space them irregularly rather than at uniform intervals for a less clinical result. Warm white (2700K to 3000K) blends better with plant material than cool white.
Stick to warm white (2700K) for planting areas and social spaces. Cool white (4000K and above) reads as harsh outdoors at night and makes foliage look gray.
—
Moonflower (*Ipomoea alba*) opens in the evening and closes by morning. Its large white blooms reflect available light well and release a strong, sweet fragrance. Jasmine (*Jasminum officinale* and related species) blooms in warm months and scents a significant radius around the plant.
Evening primrose (*Oenothera biennis*) opens at dusk and attracts moths, which add movement to a nighttime garden. Four o’clocks (*Mirabilis jalapa*) open in late afternoon and stay open through the night.
White or silver-variegated leaves catch ambient light and remain visible after dark without any direct illumination. Variegated hostas, dusty miller, and white-edged caladiums all hold up well in low light. Ghost fern (*Athyrium* ‘Ghost’) has silvery fronds that glow under even minimal light.
Gardenia, sweet autumn clematis, nicotiana, and heliotrope all release scent more strongly in the evening. Positioning these near seating areas or along entry paths makes the most of that quality.
Fine-textured grasses like Mexican feather grass (*Nassella tenuissima*) catch even slight breezes and create movement that registers visually at night. Backlit with a low uplight, they read beautifully against a dark background.
—
—
A well-lit, well-planted nighttime garden extends the usable hours of your outdoor space across spring, summer, and fall. Fragrant plants and controlled lighting also reduce the need for additional décor. The effect is layered and finished without relying on furniture, rugs, or accessories to carry the space.
From a practical standpoint, low-voltage LED landscape fixtures are inexpensive to run and last several years with minimal maintenance. Night-blooming plants require no more care than standard garden plants.
—
Using only bright white light. High-lumen floodlights kill atmosphere. Dimmer, warmer sources at lower angles create depth. Floodlights belong at entries for security, not throughout a garden.
Ignoring fragrance placement. Planting jasmine at the back fence wastes it. Scent disperses quickly outdoors. Place fragrant plants within six to eight feet of where people sit or walk.
Skipping the accent layer. Most DIY lighting setups stop at path lights and string lights. Without at least a few uplights or spotlights, the garden itself disappears into darkness after sunset.
Overcrowding with too many fixture types. Mixing lanterns, string lights, bollards, spotlights, and colored LEDs in one small space reads as cluttered. Pick two or three fixture types and repeat them.
—
What plants bloom or perform best at night for a backyard garden?
Moonflower, jasmine, evening primrose, nicotiana, and four o’clocks are reliable choices. For foliage that reads well after dark, look for silver or white-variegated varieties and fine-textured ornamental grasses.
What color temperature is best for outdoor landscape lighting?
2700K to 3000K (warm white) suits most residential gardens. It complements skin tones, warm wood tones, and green foliage without the clinical quality of cooler sources.
Do I need an electrician to install landscape lighting?
Low-voltage systems (12V) connect to a plug-in transformer and are designed for homeowner installation. Line-voltage systems (120V) require a licensed electrician. Most decorative landscape lighting sold for residential use runs on low voltage.
How do I prevent my outdoor lighting from looking overdone?
Use restraint with fixture count, stick to one color temperature, and light features rather than flooding entire areas with light. Dark space between lit areas creates contrast, which is what makes the lit zones look intentional rather than excessive.
Layered lighting is a design method that combines three types of light — ambient, task, and accent — to create a backyard that works visually and functionally after dark. Rather than relying on a single overhead source, it builds depth by placing different fixtures at different heights and angles.
—
Ambient lighting provides the overall base level of illumination. Task lighting targets specific areas where you need clear visibility, like a grill station or outdoor dining table. Accent lighting adds drama by drawing attention to trees, walls, or architectural details.
These three layers work together. Without all three, outdoor spaces tend to feel either too dark or too harshly lit.
—
Start with ambient light. Overhead string lights, lanterns, or flush-mounted ceiling fixtures on a covered patio establish the general brightness level for the space.
Add task lighting next. Focus this on cooking zones, steps, and seating areas where people need to see clearly. Under-counter lights, directional wall sconces, and recessed fixtures all work well here.
Layer in accent lighting last. Uplighting placed at the base of trees or along fence lines creates contrast and visual interest. Low-voltage spotlights work well for highlighting texture in stone walls or garden beds.
LED fixtures are worth using throughout. They support dimmer switches, draw less power, and last significantly longer than halogen alternatives.
—
Dimmers give you real flexibility. A single backyard can shift from a lit dinner setting to a low, relaxed atmosphere without rewiring anything.
Pathway lighting does two things at once: it marks safe walking routes and adds a finished look to garden borders. Pairing it with planters at key points reinforces both functions.
Energy savings are practical, not just a talking point. LED fixtures typically use 75% less electricity than incandescent bulbs and can last 25 times longer, according to the U.S. Department of Energy.
—
Overlighting is as much of a problem as underlighting. Placing too many bright fixtures at the same height flattens the space and removes any sense of depth.
Skipping dimmers limits how much you can actually use the space. Fixed-output fixtures lock you into one mood regardless of the occasion.
Ignoring the transition between indoor and outdoor light levels creates visual jarring when moving between spaces. Matching approximate brightness at doorways and entry points makes the connection feel natural.
Placing uplights too close to a tree trunk washes out the texture you’re trying to highlight. Moving them farther out and angling them upward at roughly 45 degrees produces better results.
—
What is the difference between uplighting and downlighting in a backyard?
Uplighting places the fixture at ground level and directs light upward, which works well for trees, columns, and vertical features. Downlighting mounts the fixture high and casts light downward, mimicking natural moonlight and reducing glare at eye level.
How many lighting layers do I actually need?
Most outdoor spaces benefit from all three layers, but the ratio depends on how you use the space. A dining-focused patio needs stronger task lighting. A garden path needs more accent and ambient coverage. Start with ambient and task, then add accent where it improves specific features.
Are smart lighting systems worth the cost for backyards?
If you use the space regularly and want scheduling or remote control, yes. Smart systems let you program lighting scenes, adjust brightness from a phone, and automate on/off times. For occasional-use spaces, a standard dimmer setup is often sufficient.
What color temperature works best for outdoor lighting?
Warm white (2700K to 3000K) is the most widely used range for residential outdoor spaces. It feels inviting without being harsh. Cool white (4000K and above) is better suited to security lighting or task-heavy areas where color accuracy matters more than atmosphere.
Choosing the right plants for a nighttime garden is just as important as choosing the right lights. The plants you select determine whether your backyard feels alive after dark or simply fades into shadow.
—
Good outdoor lighting sets the stage, but plants define what that light actually illuminates. White and pale-colored blooms reflect moonlight and low-voltage fixtures more effectively than dark foliage, producing a naturally luminous effect without additional hardware. Jasmine, evening primrose, and other night-blooming species release fragrance after sunset, which changes how the space feels at a sensory level rather than just a visual one.
—
White or cream-colored flowers such as moonflower, white coneflower, and gardenia catch available light and remain visible long after darker blooms disappear. Silvery foliage plants like lamb’s ear or dusty miller serve a similar purpose without relying on bloom cycles.
Evening primrose opens at dusk and closes by morning. Jasmine releases its strongest scent at night. Four o’clocks bloom in late afternoon and hold through the evening. These species add a layer of presence that visual plants alone cannot replicate.
Ornamental grasses, bamboo, and trees with rough or peeling bark respond well to ground-level uplighting. The light catches surface detail and creates depth that flat, smooth plants do not offer. Textured plants also cast interesting shadows on nearby walls or fences.
Ferns and hostas tolerate lower light conditions and stay green and structured even in dimly lit garden beds. They fill space between taller specimens and prevent bare patches that would otherwise look unfinished at night.
—
Pathway lighting works best when the plants bordering it have some structure. Tall ornamental grasses or low boxwood hedges frame a lit path without blocking it. Ground covers planted between fixtures soften the edges and prevent the path from looking like a runway strip.
Place fragrant plants close to areas where people pause — near seating, doorways, or path junctions — so the scent is noticeable without being overpowering from a distance.
—
Planting only for daytime appearance is the most frequent error. A garden filled with richly colored blooms can look flat and gray at night because those colors absorb rather than reflect light.
Relying entirely on lighting without considering plant texture leads to an over-lit, flat look. Uplighting a smooth, featureless shrub produces little visual interest. The fixture is doing all the work with nothing to show for it.
Placing fragrant plants too far from seating areas wastes their effect. Scent disperses quickly outdoors, so positioning matters.
Ignoring growth habit is another common issue. A plant that fills a well-lit spot beautifully in spring may block the light source entirely by late summer if it is not pruned regularly.
—
A well-chosen plant palette reduces how much artificial lighting you actually need. Reflective foliage and pale blooms amplify existing light rather than requiring additional fixtures. That translates to lower energy use and a softer, more natural atmosphere.
Fragrant plants extend how long people stay outdoors. A space that smells good at night encourages longer use of patios, decks, and garden seating areas.
Textured plants give lighting something to work with, making the overall setup look intentional rather than simply functional.
—
Which plants are best for reflecting moonlight?
White-flowering plants such as moonflower, white roses, and gardenia reflect available light most effectively. Silvery-leaved plants like lamb’s ear and artemisia work well even when not in bloom.
Do night-blooming plants need special care?
Most night-blooming species, including evening primrose and four o’clocks, are low-maintenance. Jasmine varieties vary by climate, so confirming that a specific type is suited to your hardiness zone matters before planting.
Can I use night-garden plants in containers?
Yes. Jasmine, moonflower, and hostas all grow well in containers, which makes them easy to position near seating or along pathways without permanent planting.
How do I prevent plants from blocking pathway lights?
Choose low-growing or naturally compact species for areas directly adjacent to fixtures. Regular pruning keeps growth from spilling over light housings, and selecting plants with a known mature height avoids the problem before it starts.
Luxury outdoor design isn’t about spending more — it’s about organizing space more deliberately. The primary keyword driving this topic is luxury backyard transformation, and the search intent is informational with strong commercial overlap: people researching how to upgrade their outdoor spaces before hiring a designer or buying materials.
At its core, a luxury backyard transformation uses spatial zoning and design layering to convert an undifferentiated yard into a functional, visually rich environment.
—
Spatial planning means dividing your backyard into distinct zones, each with a clear purpose. A dining area, a lounging space, a garden corridor, and a focal feature zone can coexist in even a modest yard if the layout is intentional.
Without zoning, outdoor spaces feel like a single flat surface with furniture dropped onto it. With it, movement through the space feels natural, and each area has its own character.
The goal isn’t to fill every corner. It’s to define how people will move through and use the space.
—
Layering is what separates a designed space from a decorated one. It works across three dimensions: horizontal layout, vertical elements, and ground-level variation.
Raising or lowering sections of your yard — through decking, sunken seating areas, or raised planting beds — makes flat ground feel dynamic. Even a single step change between zones signals a transition and adds architectural weight.
Trellises, wall-mounted planters, and climbing plants bring greenery into the design without consuming floor space. They also frame zones and add enclosure, which makes open yards feel more intimate.
A fire feature, water element, or sculptural planting draws the eye and anchors social interaction. Focal points don’t need to be expensive — they need to be positioned where sight lines naturally converge.
Seating placed alongside garden features rather than in isolation creates a layered scene rather than a furniture arrangement. Built-in benches adjacent to raised beds, for example, serve a visual and functional role simultaneously.
—
Lighting isn’t decorative afterthought. It determines whether a space gets used after dark or sits empty.
Effective outdoor lighting works at multiple levels: path lighting for safety, uplighting for trees and structures, ambient lighting for dining and lounging areas. Each layer serves a different function, and together they extend the hours the space is genuinely usable.
Avoid flooding the yard with a single overhead fixture. It flattens everything it touches.
—
A well-zoned, layered outdoor space delivers returns beyond aesthetics. Defined zones reduce decision fatigue — people naturally gravitate to the right area for the right activity. Vertical layering maximizes plantings in smaller yards. Considered lighting reduces energy use by targeting specific areas rather than lighting everything at once.
From a property perspective, structured outdoor spaces consistently add perceived and assessed value, particularly when the design reads as intentional rather than accumulated.
—
Treating the yard as one zone. Placing all furniture in a single cluster, regardless of yard size, eliminates the sense of discovery and flow that makes a space feel expansive.
Skipping elevation variation. Flat yards stay flat when designers only add objects rather than altering the ground plane. Even modest raised elements shift how the space reads.
Over-lighting or under-lighting. Both create problems. Too much light kills atmosphere; too little makes the space unusable and potentially unsafe.
Choosing focal points without considering sight lines. A water feature hidden behind a hedge doesn’t function as a focal point. Placement relative to entry points and primary seating matters.
Treating plants as filler. Planting that isn’t integrated into the spatial logic of zones looks like landscaping applied after the fact, which it often is.
—
What’s the difference between zoning and just arranging furniture?
Zoning uses physical and visual boundaries — grade changes, planting, paving material shifts, lighting — to define areas. Furniture arrangement alone doesn’t create zones; it just fills space.
Do these principles apply to small backyards?
Yes, and they’re arguably more important in smaller spaces. Defined zones prevent a small yard from feeling chaotic, and vertical layering compensates for limited floor area.
How much does elevation change cost to introduce?
It varies widely. A simple raised deck or single-step transition can cost a few hundred dollars in materials. Sunken fire pit areas or full tiered landscaping run into the thousands. The principle applies at both scales.
Is professional design necessary to achieve these results?
Not always. The principles are learnable and applicable to DIY projects. Where professional input adds the most value is in structural changes — anything involving grading, drainage, or permanent construction.
Custom backyard construction requires a defined set of decisions before any work starts. Skipping this stage leads to permit delays, budget overruns, and design changes mid-build — all of which cost more to fix than to prevent.
—
Local regulations dictate what percentage of your lot can be covered by structures, where setbacks apply, and whether easements restrict certain areas from development. These rules vary significantly by municipality, so pulling your property’s zoning records early is essential.
Zoning rules vary by municipality — pull your property records before design work begins.
Easements — particularly utility or drainage easements along property edges — can eliminate entire sections of your planned layout. Confirming these boundaries before design work begins prevents expensive redesigns later.
Permits follow zoning. Most jurisdictions require permits for patios above a certain square footage, retaining walls over a specific height, outdoor kitchens, and any structural additions. Submitting incomplete permit applications stalls projects by weeks.
—
A finalized layout determines where every other element goes. Traffic flow between the house, outdoor dining areas, lawn space, and any structures should be mapped before material selections happen. Changing layout after grading begins adds cost.
Surface materials affect drainage grades, structural base requirements, and long-term maintenance. Concrete, pavers, decomposed granite, and natural stone each have different installation requirements. Selecting materials late in the process can require redoing prep work.
Electrical, gas, and water lines need defined locations before excavation. Outdoor kitchens, fire features, irrigation systems, and lighting all require utility access. Running conduit or gas lines after hardscape is installed costs significantly more than routing them during initial grading.
—
Backyard construction costs vary widely based on scope, materials, and regional labor rates. A basic patio with simple landscaping runs differently than a full outdoor living space with a kitchen, pergola, pool, and irrigation.
Get itemized quotes from at least two contractors before finalizing your budget. Itemized quotes reveal where your money goes and make it easier to scale the project up or down based on priorities. Build a contingency of 10 to 15 percent into the total for unforeseen site conditions, material price changes, or permit-related modifications.
—
A landscape designer working from the start catches grading problems, soil conditions, and drainage conflicts that don’t appear on paper plans. They also coordinate between trades, which reduces scheduling gaps and miscommunication between contractors.
Designers familiar with local conditions know which plants, materials, and drainage solutions perform well in your climate. Bringing one in after construction has started limits their ability to influence decisions that would have been straightforward earlier.
—
Poor drainage is one of the most common causes of backyard construction failures. Water that pools near the foundation, collects under paved surfaces, or flows toward neighbor properties creates both structural and legal problems.
A proper drainage plan accounts for natural slope, soil permeability, downspout discharge points, and any existing drainage infrastructure. French drains, channel drains, dry creek beds, and grading adjustments are all options, but the right solution depends on site-specific conditions rather than general preference.
—
Finalizing aesthetics before function leads to layouts that look good in renderings but perform poorly in use. Outdoor kitchens placed far from the house become inconvenient. Fire features positioned without regard for wind direction become unusable. Shade structures oriented without considering sun angles provide little actual relief.
Underestimating permit timelines is another frequent issue. In some areas, permit approval takes four to eight weeks. Starting the permit process simultaneously with design work, rather than after it, keeps the overall schedule intact.
Choosing a contractor based on price alone without reviewing completed projects of similar scope increases the risk of substandard work. Ask for references from projects that match your build in complexity and materials.
—
Projects with finalized plans before construction begins consistently finish closer to schedule and within budget. Contractors can sequence work more efficiently when decisions aren’t being made during the build. Subcontractors for electrical, plumbing, and masonry can be coordinated in advance rather than scheduled reactively.
Clear documentation also protects the homeowner. If disputes arise about scope, a detailed plan serves as a reference point. Permits create an official record that the work was inspected and compliant, which matters when selling the property.
—
What decisions must be made before a backyard construction permit is submitted?
Most permit applications require a site plan showing structure locations, dimensions, setbacks from property lines, and utility connections. Material specifications and structural details may also be required depending on the scope.
How long does a custom backyard project typically take from planning to completion?
A straightforward patio and landscaping project can take six to ten weeks from permit approval to completion. A full outdoor living space with a kitchen, pool, and lighting typically runs four to six months, depending on contractor availability and permit timelines.
Do I need a landscape designer if I already have a contractor?
A contractor executes the build. A landscape designer plans the space, addresses drainage, selects plants and materials suited to your conditions, and coordinates the visual and functional outcome. For complex projects, having both reduces errors and improves the final result.
What happens if construction starts before permits are approved?
Unpermitted work can result in stop-work orders, fines, and a requirement to demolish and rebuild to code. Some jurisdictions require retroactive inspection fees that cost more than the original permit. Title and insurance complications can also arise when selling the property.
The right custom backyard design team turns an underused outdoor space into a functional, well-planned environment tailored to how you actually live. This means assessing more than just aesthetics — it requires checking a team’s technical depth, project management skills, and fit with your specific goals before signing anything.
—
Custom backyard design goes beyond choosing plants or patio materials. It involves site analysis, spatial planning, drainage considerations, lighting layout, and sometimes structural work like pergolas, retaining walls, or outdoor kitchens. A team offering true custom work builds the design around your property’s conditions and your lifestyle, not a recycled template.
—
General landscaping experience differs from luxury or custom outdoor design. Look for a team with substantial project history in custom work specifically — at least a decade is a reasonable baseline. Ask what types of projects they handle most often and whether any are similar in scale or complexity to yours.
A portfolio tells you more than a sales pitch. Look for before-and-after documentation that shows different styles, site types, and budget levels. If every project looks identical, the team likely works from a limited set of design formulas rather than building each project from scratch.
Backyard projects frequently require permits — for decks, fire features, pools, or grading changes. A competent team knows local regulations and builds that process into the project timeline. Ask directly how they handle permitting and whether any past projects faced compliance issues.
Vague estimates create problems mid-project. A reliable team provides itemized proposals, explains where costs can shift, and outlines what triggers additional charges. If a designer resists breaking down a quote, that’s a practical red flag.
Many reputable teams offer a no-cost initial consultation. Use it to gauge whether they listen more than they pitch. A designer who asks about how you use your outdoor space — not just what you want it to look like — is more likely to produce something functional.
—
A poorly matched design team creates compounding problems: redesigns mid-project, permit delays, budget overruns, and a finished space that doesn’t work for daily use. A well-matched team reduces friction at every stage, keeps the project on schedule, and delivers results that hold up over time — not just at the reveal.
Custom backyard projects also carry significant financial weight. Getting the team selection right protects that investment.
—
Choosing based on price alone is the most common error. The lowest bid often reflects cut corners in materials, subcontracted labor without oversight, or an inexperienced crew.
Skipping reference checks is another. Ask for two or three past clients you can contact directly. A strong team won’t hesitate to provide them.
Some homeowners also treat the initial design as final without asking what happens if site conditions change or if adjustments are needed after construction begins. Clarify the revision and change-order process before work starts.
—
How long does a custom backyard design project typically take?
Timelines vary by scope. A moderate custom project — patio, planting plan, lighting — typically runs 6 to 12 weeks from design approval to completion. Larger projects involving pools, structures, or significant grading can extend to 6 months or more.
What should I bring to a first consultation?
Bring photos of styles you like, a rough sense of your budget range, and any site constraints you’re aware of — drainage issues, sun exposure, HOA rules. The more context you provide, the more useful the consultation.
Is a landscape architect different from a landscape designer?
Yes. Landscape architects hold a licensed professional credential and are required for projects involving structural or civil engineering elements. Landscape designers typically handle aesthetic and planting-focused work. For complex custom projects, an architect may be necessary.
How do I know if a quote is reasonable?
Get at least three proposals for comparison. Beyond total cost, examine what’s included — materials specified by grade, labor hours, project management, and post-installation support. A higher quote with clear line items is often safer than a lower one built on vague assumptions.
Custom backyard design is the process of planning and building an outdoor space tailored to how you live, not how a catalog says you should. Done well, it adds usable square footage to your home, increases property value, and gives you a place you actually want to spend time.
—
Off-the-shelf landscaping drops the same patio, the same plants, and the same lighting into every yard. Custom design starts differently. It begins with your site conditions, your habits, and your budget, then builds outward from there.
A custom design might mean a shaded dining area positioned to catch the evening breeze, a fire pit set away from the main seating so smoke doesn’t follow guests, or a lawn shaped specifically for the way your kids play. The details are deliberate, not decorative.
—
Before any contractor visits, spend a few weeks noticing what you actually do outside. Where do you sit in the morning? Where do kids or pets tend to gather? Which areas stay wet after rain? Which corners get no sun?
These observations shape every decision that follows.
Backyard projects range from a few thousand dollars for simple landscaping to well over $100,000 for pools, outdoor kitchens, and full hardscape. Set a ceiling before you meet with designers. Knowing your number upfront prevents scope creep and keeps conversations grounded.
Divide the yard into functional areas based on how you plan to use it. A cooking zone needs gas or electrical access. A dining zone needs shade and level ground. A play area needs soft material under foot. A garden zone needs sun exposure mapped by season.
Each zone has specific requirements. Mixing them without planning leads to yards that look full but function poorly.
Teak holds up in humid climates. Concrete pavers crack in regions with hard freeze-thaw cycles if not installed with proper base depth. Natural stone is beautiful but demands sealing in wet climates. Your material choices should match where you live, not just what looks good in photos from Arizona or coastal California.
Landscape lighting is far easier and cheaper to install during construction than after. Plan circuits, fixture placement, and switch locations at the design stage. Low-voltage LED systems handle most residential needs and cost less to run than traditional line-voltage fixtures.
Get at least three bids. Ask for references from completed projects, not renderings. Verify licensing and insurance. A designer who builds is not always better than a designer who partners with a separate contractor, but the communication between those two parties matters significantly.
—
Not every premium feature delivers equal value. These tend to pay back in usability and resale:
A heated pool in a region with four months of warm weather is a different calculation than one in Florida or Southern California. Match the feature to the climate and the frequency you’ll use it.
—
Building without drainage planning. Water follows the path of least resistance. A beautiful patio that slopes toward the house foundation or pools after rain is expensive to fix after the fact.
Choosing plants for appearance only. A plant that requires weekly watering or aggressive pruning becomes a chore. Native and adaptive species generally need less water, less fertilizer, and less intervention while supporting local insects and birds.
Scaling features to the wrong yard size. A 12-foot pergola over a 10-foot patio looks crowded. A small fire pit in a large open yard looks abandoned. Scale matters as much as style.
Skipping permits. Fences, pools, structures over a certain square footage, and electrical work typically require permits. Building without them creates title problems when you sell and can require costly removal.
Treating the design as permanent. Yards change as families change. Build in flexibility where you can: open lawn areas, modular furniture, and planting beds that can be reconfigured.
—
The practical return on a custom backyard is straightforward. You spend more time outside, which has measurable effects on stress and sleep for most people. You entertain at home more often, which reduces dining-out costs over time. A professionally designed outdoor space typically returns 50 to 80 percent of its cost at resale, depending on the market and features installed.
Beyond numbers, the less-discussed benefit is behavioral. When a space is designed for how you actually live, you use it. Spaces designed for a hypothetical version of your life collect leaves.
—
How long does a custom backyard project take from design to completion?
Simple landscaping projects take two to six weeks. Projects that include hardscape, irrigation, lighting, and structures typically run three to five months from final design approval to completion. Permitting timelines vary by municipality and can add four to twelve weeks.
Do I need a landscape architect, or will a landscape designer work?
Landscape architects hold licensed professional credentials and are required for projects involving significant grading, drainage engineering, or structural elements. Landscape designers handle most residential aesthetic and planting projects without that licensing. For complex sites, the architect is worth the additional cost.
What’s a reasonable budget per square foot for custom backyard work?
Softscape and basic hardscape runs roughly $10 to $25 per square foot. Mid-range projects with covered structures, irrigation, and lighting average $25 to $60 per square foot. High-end projects with pools, outdoor kitchens, and premium materials range from $60 to $150 or more. These figures vary significantly by region.
Can I phase the project to spread costs over time?
Yes, and it often makes sense to do so. The key is designing the full plan before building anything so that each phase integrates cleanly with the next. Installing a patio without accounting for a future pergola footing, or planting trees without knowing where a pool will go, creates problems later.